Did you know that you can set up an Outlook.com account (formerly known as Hotmail) with your own current email address or personal domain and don't necessarily have to use an @outlook.com address?
This allows you to both send and receive emails with an address which you already own, even if it is from another provider such as Gmail.
Using an Outlook.com account is a great alternative for your current POP3 or IMAP account if you want to sync your emails, contacts and calendar items with multiple devices such as your desktop, laptop, netbook, tablet or smartphone. It behaves a lot like a personal (hosted) Exchange or Office 365 account but for free.
Setting this up is relatively quick and easy but there are some pitfalls to notice. This guide walks you through the entire process of setting up an Outlook.com account with your own current email address and how to transfer all your current data.
- Set up a Microsoft Account for your current address
- Configure Outlook.com to retrieve your emails
- Connect with the Outlook Hotmail Connector
- Transfer your data
- Remove your old POP3/IMAP account
- Exchange ActiveSync access
- Tasks, Notes and Journal syncing support
- Backup concerns
- Receiving emails quicker
- Domain owner
Set up a Microsoft Account for your current address
A Microsoft Account is basically your username to make use of various Microsoft services such as Outlook.com and SkyDrive. This username can be any existing email address you already own or a new Outlook.com address. In this guide, we obviously go for the first option.
- To sign up for a Microsoft Account go to; https://signup.live.com
- Fill out the form with the address that you want to use.
The password which you set here is for your Microsoft Account only; it does not have to be the same password that you currently have for accessing your emails. In fact, it is highly recommended to choose a different password. Also make sure you are using a Strong password. - Type the captcha characters and press the "I Accept" button.
- Within minutes, you'll receive an email from "Microsoft account team" with the subject "Verify your email address" with instructions to confirm your sign up.
Click on the link in the email to confirm the signup.
If the mail got lost, login with your Microsoft Account again and click the verification link at the top to resend the message. - On the confirmation page, press OK to go to your Microsoft Account "Account summary"where you can specify some additional information about yourself, set a display picture and configure additional security options. You can skip this for now.

You are free to specify any address which you already own when signing up for an Microsoft Account. This address can then also be used for an Outlook.com mailbox.
Configure Outlook.com to retrieve your emails
Now that you have signed up for a Microsoft Account with your existing email address, you can configure Outlook.com to collect your mail from your current mail account.
Tip!
Do you own the entire domain rather than just the email address? Then you can skip this step and configure your domain to let the mail servers of Outlook.com directly handle all the emails for your entire domain instead. For more info about this, see theDomain owners section.
- Go to the Outlook.com webpage and sign in with the email address and password you have specified when setting up your Microsoft Account if you are not automatically signed in already.
- Click on the "Continue to inbox" button when you get a "Welcome to your new Outlook.com inbox". You'll find this and additional information also in an email that has been placed in your Inbox from the Outlook Team.
In the top right corner but on the left of your name, you'll see a gear icon. Click on it and from the menu that pops up choose: More mail settings.
- Under "Managing your account" click on: Your email accounts
- It the "Add an email account" section, click on the button: Add a send-and-receive account
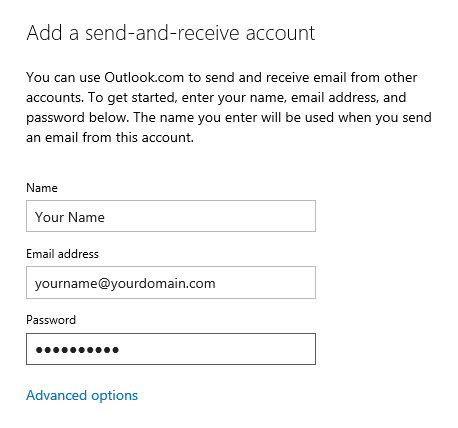
On the "Add a send-and-receive account" page, you'll find that your current email address has already been filled out. For most POP3 accounts, you only need to fill out the password for your account (so not your Microsoft Account password) to complete the configuration.
If the AutoConfiguration of your account doesn't work, click on the "Advanced options" link to specify the correct server details for your POP3 account and SMTP server. You'll also be automatically transferred to this page when the AutoConfiguration fails.
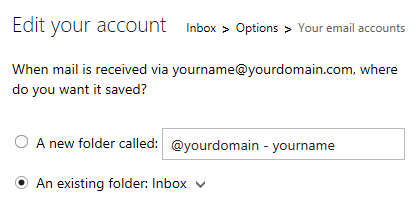
Once successfully configured, Outlook.com will prompt you what to do with emails retrieved from your current address. By default it wants it to place it into a separate folder but since this is the first and main email account you should select "An existing folder: Inbox" instead.

- Save your settings.
-
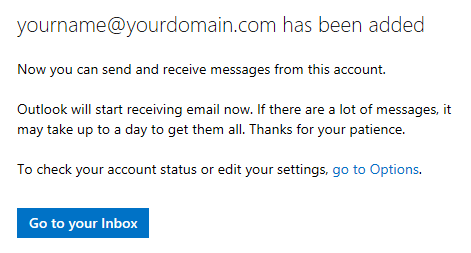
You'll now get a confirmation message that your messages are being collected and with the option to return to your Inbox or to verify your account status.
Choose to go back to your Inbox folder to see your messages which are still in the Inbox folder of your POP3 account being collected. The mail collecting is being done in increments so if you have a lot of email still on your POP3 account, this could take a while.
Tip!
By default, your messages will also remain on the POP3 server of your email provider. If you are happy with the results and/or you have only limited space on the POP3 server, you can configure the account aggregation settings to remove the messages from the mail server once they are collected by Outlook.com.
To do this, go to your account settings as indicated in step 4 and click on the "Details"link next to your configured account and then on the "Edit" link in the pop-up dialog. In the "Incoming (POP3) server information" section, you'll find an option for "Leave a copy of messages on the server".

Comments
Post a Comment